Project 4: Verfication testing, Arduino to Raspberry Pi set-up with Python script.
2017-10-17
Objective:
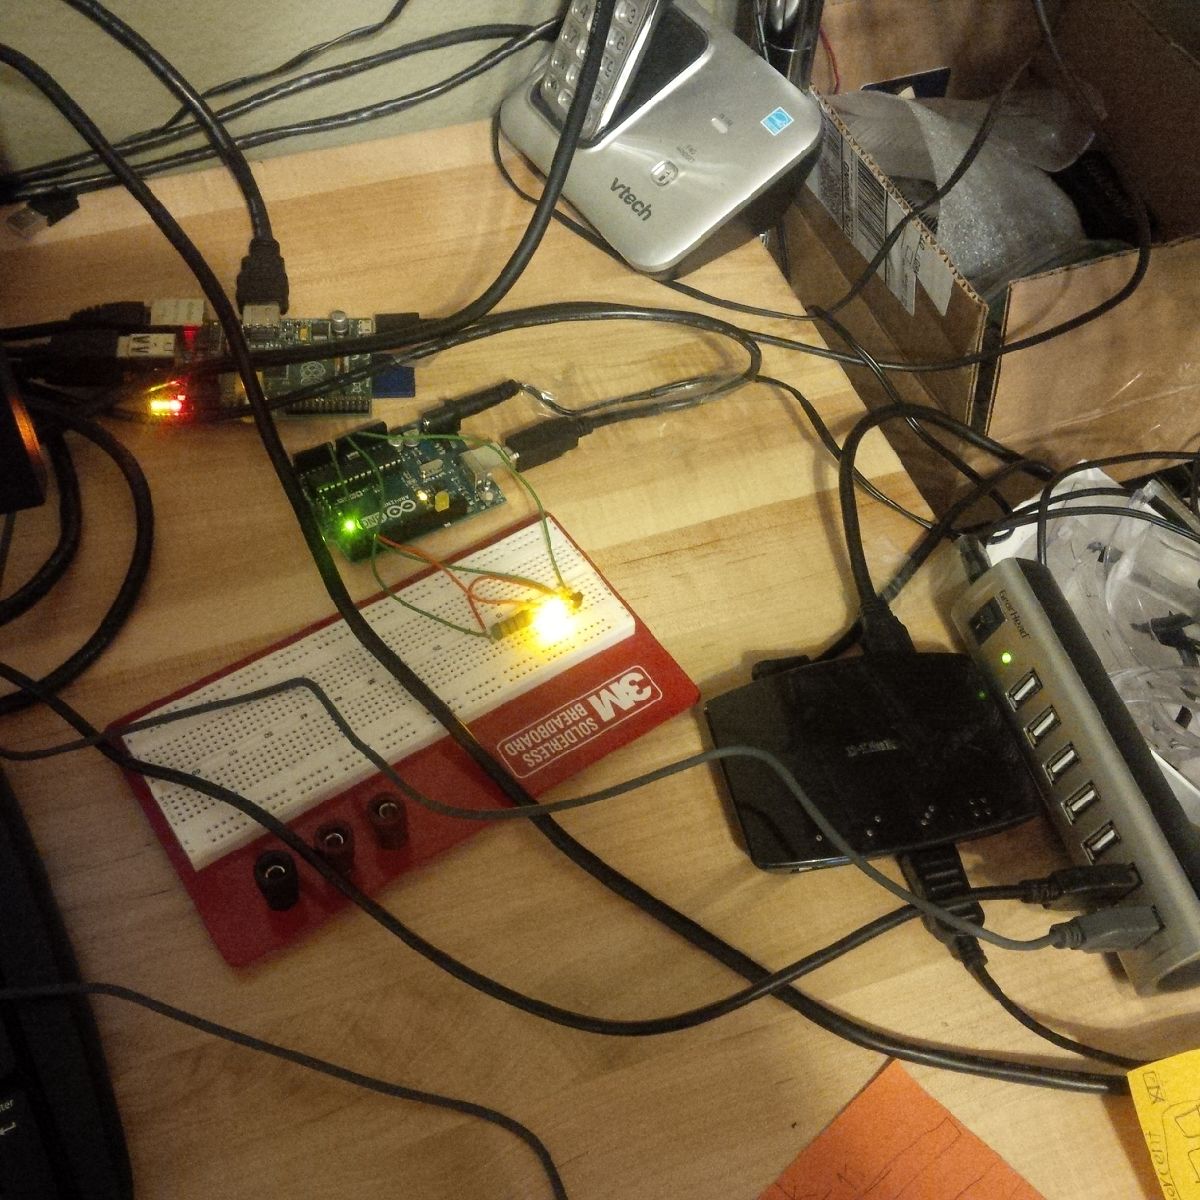
The objective of this project is to use existing code to test an Arduino to Raspberry Pi (RPi) set-up for someone inexperienced with microcontrollers. I did not want to play with the Arduino module plugged into my main workstation in case I crashed the OS. This set-up is a challenge due to RPi's (Model B) lack of capabilities, Arduino requires use of a gui and an integrated development environment (IDE). This taxed my RPi to the limit, and adds time but the benefit is any damage is limited. Over the course of the testing my set-up did crash unexpectedly once, requiring new OS load.
The primary reason for using the Arduino is that I am interested hardware that output analog signal, and have power requirements beyond what the RPi can deliver. Using an Arduino seems to be a common solution.
The project is a repost of Magpie issue 7, pages 4 to 6, titled |"Raspberry Pi & Arduino". The article was article written by Stewart C. Russell. His website is http://scruss.com/blog. I did contact him, he recommends not using this code because it is written for Python 2.7. He recommends using Python 3. I did review this and it does appear that pyFirmata (python interface released under MIT license for communicating with microcontrollers) can be used with Python 3. However, I did have issues porting over. I am posting this in python 2.7 as it worked for my needs. Use at your own risk.
Materials:
1. Raspberry Pi Model B loaded with Raspbian loaded.
2. Arduino Uno
3. USB Keyboard & Mouse
4. USB 2.0 hub (Raspberry B only has 3 USB ports but require a minimum of 3) - see notes
5. 3M Breadboard Solderless ACE309
6. Texas Instrument LM35DZ Temperature Sensor
7. 5 mm Yellow LED
8. 120Ω resistor
9. Misc. 22AWG Jumper Wires
10. USB cable with type A and Type B plug ends
Software:
1. Linux OS - used Raspbian2. Python version 2.7.9
3. Firmata - microcontroller communication protocol
4. Arduino IDE 2.1 - GUI provided by Arduino to upload instructions to microcontroller
5. pyfirmata - Python interface for the firmata protocol.
Hardware Set-Up:
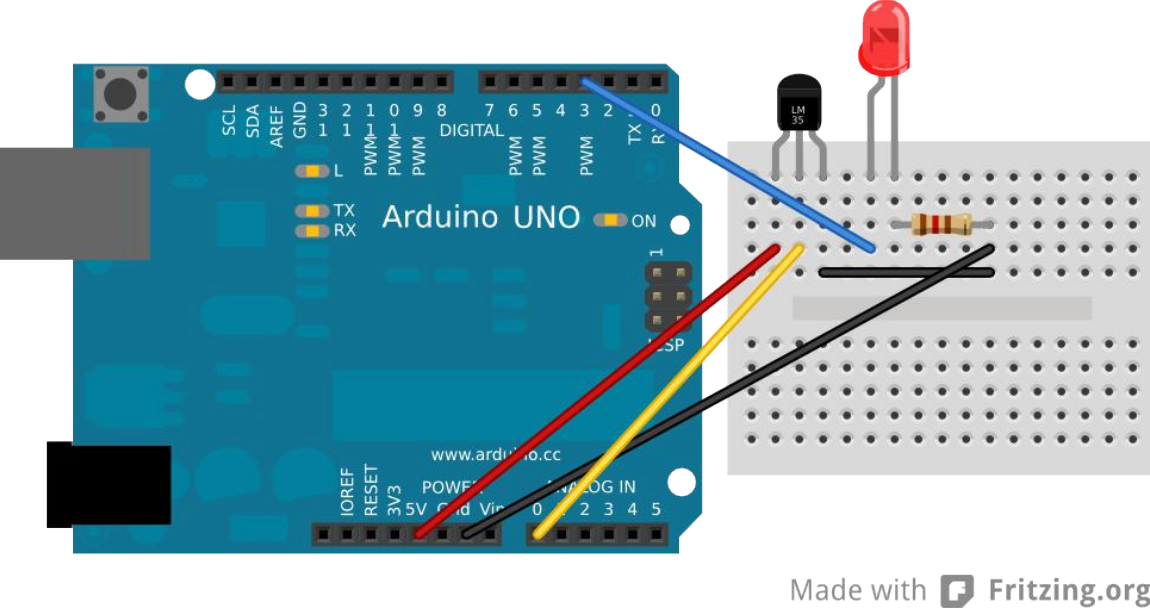
Simply plug in the circuit from the MagPi Schematic reposted below.


NOTE 1: Raspberry Pi B has a known USB driver issues. I have not looked into this in much detail but was able to get various hubs working. For example, issue I observed low speed devices (keyboard/mouse) do not work plugged directly into D-Link DUB-1340 USB 3.0 hub. However, workaround is plug in keyboard and mouse into a USB 2.0 and plug the the USB 2.0 hub in the D-Link DUB-1340. For more information best source I found:
Explanation on Raspberry Pi USB issues.NOTE 2: To be clear I am using an older RPi Model B device. USB issues may be resolved with newer models.
Test Arduino using Python script
Installing Arduino IDE and Firmata
1. First, for those used to working headless or from terminal remember to boot into gui (startx).
2. From terminal install arduino IDE using command:
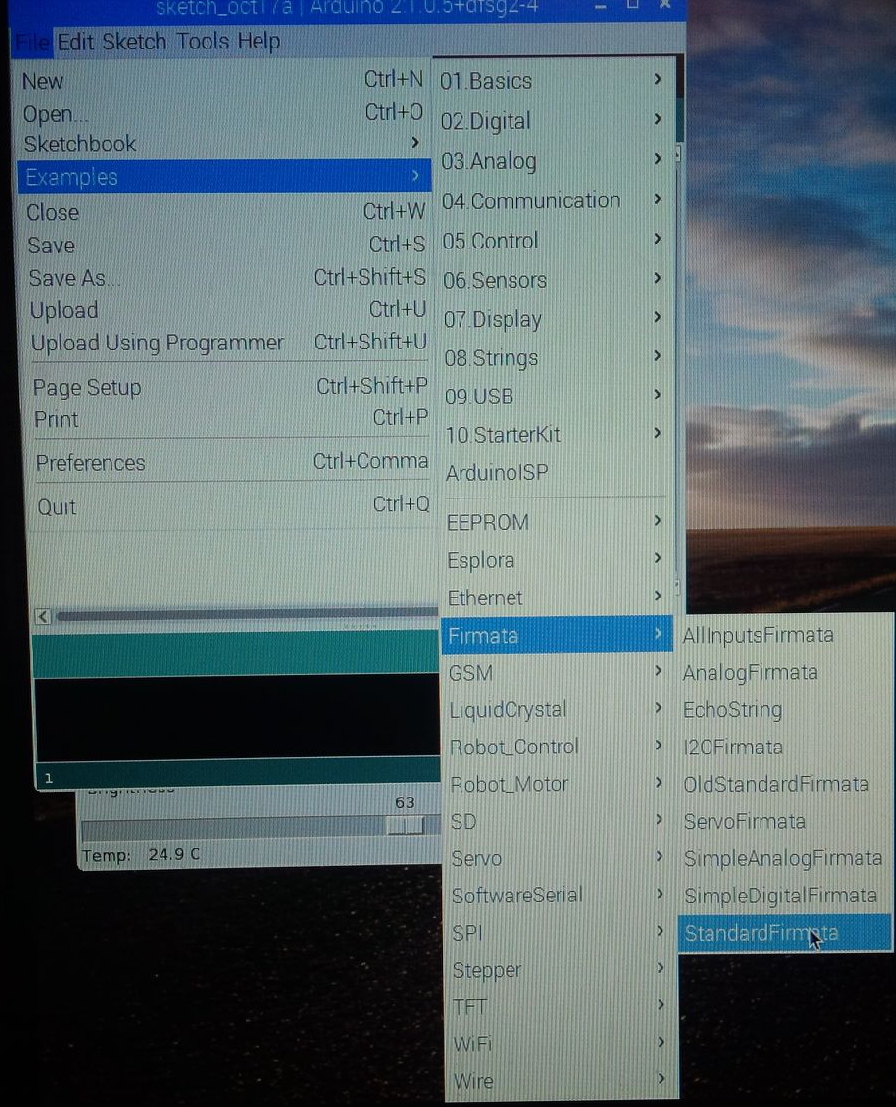
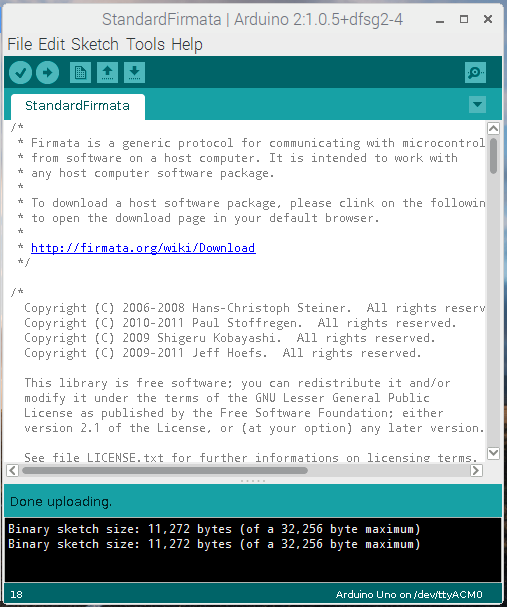
3. Once Arduino IDE is installed opened up the gui program. Then click through the example menu to StandardFirmata. Then click the upload button to load the program onto your microcontroller.
5. Now run script from Magpi issue 4, my script is called LM35.txt. Refer back to Magpi issue 4 for explanation of the script and don't forget to check the serial port, change to the one you used in the Arduino IDE.
Conclusion
There that should do it. Now move on to bigger and better things. If you can control the blinker and read the LM35 sensor you set everything up correctly. If you are having trouble with your set-up go back to the Arduino example menu and click the 01 Basics and load the BLINK program. This will at least tell you if you can blink and LED.
Design credit knxops.com in cooperation with Ltimas and co.
4. Now your microcontroller loaded with StandardFirmatacode . Now you must load firmata python module you can access the microcontroller through Python scripts. To do this enter command in terminal:
Copyright © 2019 by Gregory Altimas aka Greg Altimas


